How to Configure Outlook Express?
Followings will demonstrate how to configure Outlook Express as the email client to receive and send mails. AA Mail Server always requires ESMTP for better security, so please do not forget to select "My server need authentication" option in account property. Let's assume your server is "192.168.1.1" and account is "test@123.com" here.
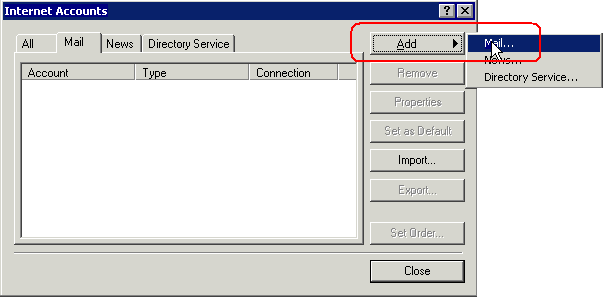
Step 1. When Outlook Express starts, click "Tools -> Accounts" menu item, select Mail tab and click "Add -> Mail" button item.

Step 3. Choose "I already have an e-mail address that I' d like to use" and fill in your email address (for this example "test@123.com"). Click "Next" button.
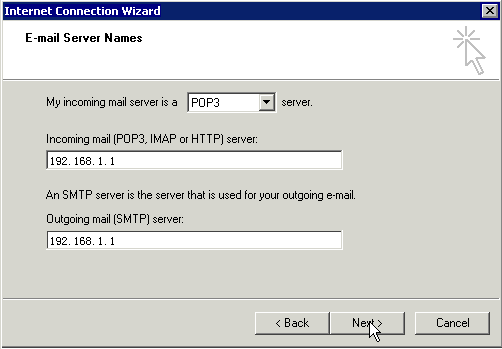
Step 4. On the "Email Servers Name" page, fill in the server information. For this example, all is "192.168.1.1". Click "Next" button.

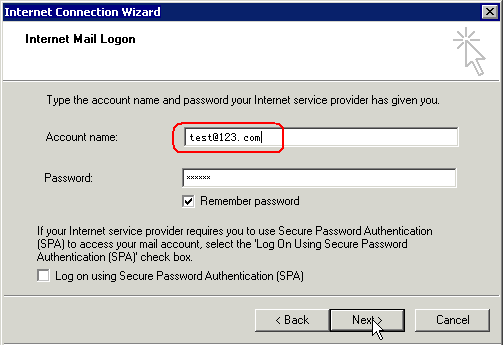
Notice: Full account name (account name + domain suffix) should be used here to support multi-domains.

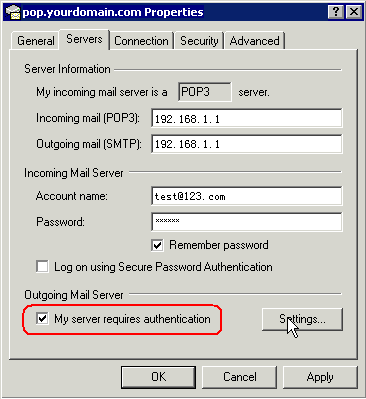
Step 7. Click "Tools -> Accounts" menu item again in Outlook Express, then choose the mail account just created in "Internet Accounts" dialog. Click "Properties" button.
Step 8. In the opened Properties dialog, change to "Servers" tab, then select the option "My server need authentication". Click "OK" button to finish ESMTP configuration. Now the new account is ready for sending and receiving emails.


